Support
Manage - Task templates
Creating a task template
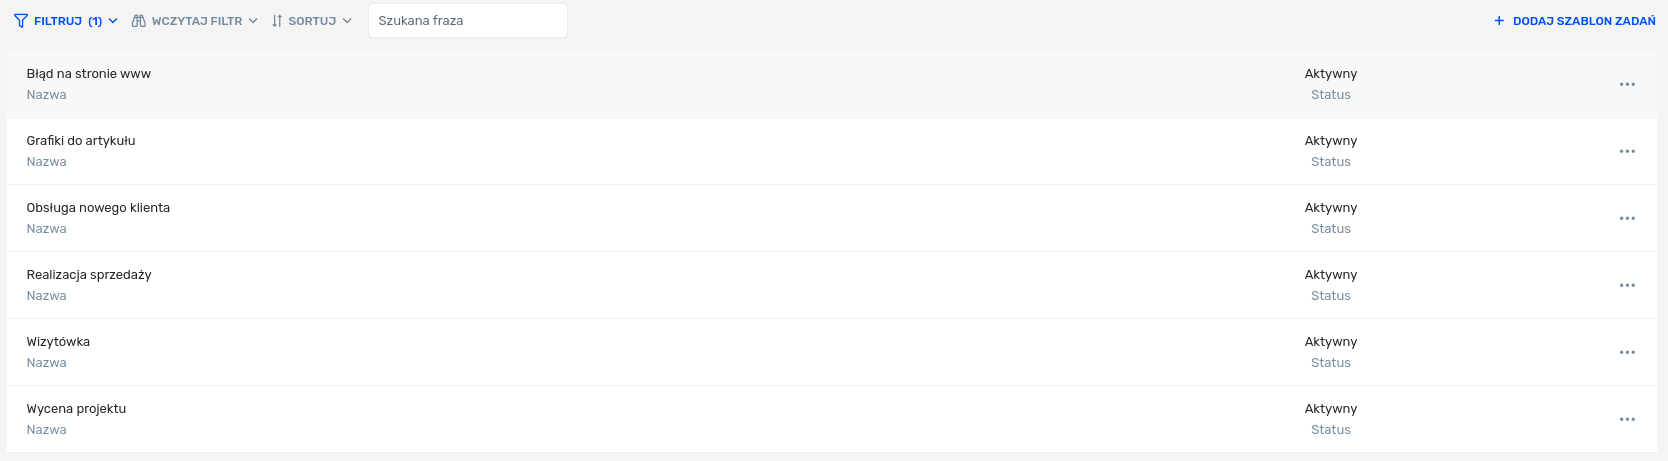
Function button  opens a pop-up menu, where you can edit, create new templates based on others and delete them.
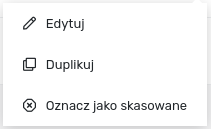
- Edit - this button opens a window with template editing. This process is described below.
- Create on the base - this button also opens a window with editing the template, however, the data in the form are preliminarily completed with data from the base template.
- Mark as Delete/Remove - these functions change the status of the templates from active to inactive and vice versa. An inactive template cannot be selected when adding a task.
Editing the task template
Editing the task template consists of three steps. In the first one, we define basic data such as name, description, or specify related projects. In the next step we define additional fields, while in the last one we define subtasks.
General data
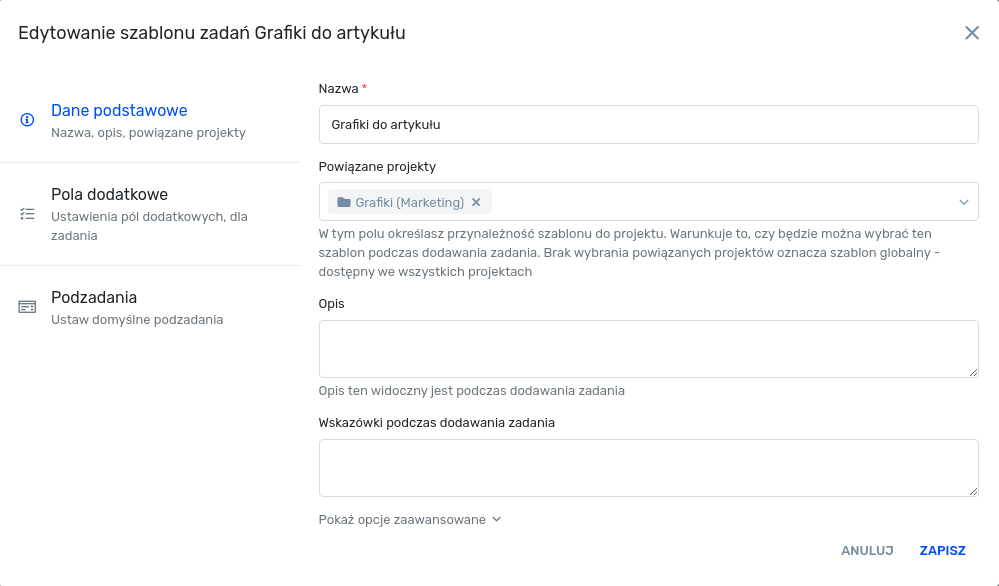
In this tab, in addition to basic information such as the name of the template and its description, we can select two flags.
- Required deadline? - This field determines whether it is necessary to specify a deadline when adding a task in this template.
- Required task description? - This flag determines whether a description is required in the process of creating the task.
In addition to the above fields, this form also contains a field for related projects. This field specifies for which projects it will be possible to select this template.
Important!
If you do not select related projects, the global template is available in all projects.
Additional fields
In this step we have the ability to specify additional fields that will be assigned to the task created using this template.
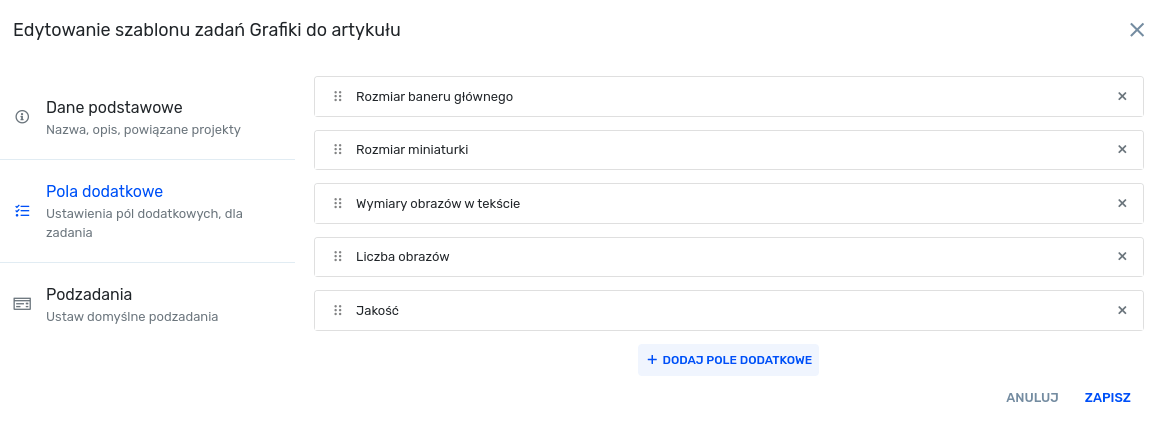
You can add an additional field by using the ![]() while deleting is done via the
while deleting is done via the![]() . After clicking the Add additional field button, we develop a form with editing a new additional field.
. After clicking the Add additional field button, we develop a form with editing a new additional field.
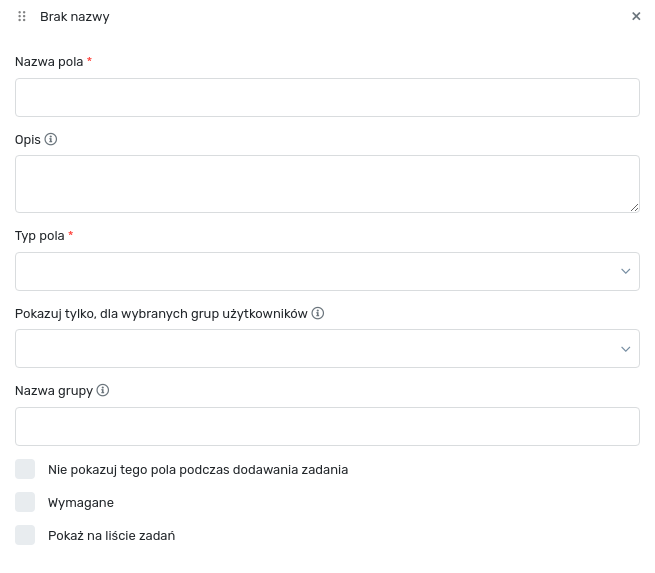
In this form we have several fields to specify.
- Name - name of the additional field displayed when adding the task and on its details.
- Description - this field contains a description of the additional field. If this value is completed, the description will be next to the name after hovering over the icon .
- Field type - here we indicate what data we are interested in for this additional field. You can choose from:
- Date - field for entering the date.
- Numeric field - field with the ability to enter only numeric values.
- Pre-defined field - here we can indicate the predefined field from which we want to take information. More about the predefined fields can be found in the section Management - Pre-defined fields.
- Text field - normal field with the possibility of typing in text.
- Multi-line text field - a field analogous to the text field, except that you can enter multiple lines of text here.
- Checkbox - using this type of field you can specify the values that you will be able to select in this field.
- Checkbox yes/no - simplified version of the checkbox, which by default contains two options to choose from: yes or no.
- User - this field allows you to select the user.
- Attachment - this field allows you to add an attachment to the task.
- Show only, for selected groups - indicating user groups in this field means that this field will be visible only for given user groups. If you do not select any group, the field will be visible for all.
- Group name - this field is optional and allows us to group additional fields with its name. All fields with the same name will be grouped into one section.
- Required - this flag determines whether this field is required when adding a task.
- Do not show this field when adding the task - if the field is not marked as required we can define whether we want to show this field when adding the task. If this flag is checked, this additional field will appear only in the task details view.
- Field options - applies only to the additional field of the checkbox type. Here we enter all options that the user will be able to select for this field. You can also sort these options using the drag and drop functionality.
- Alphabetical order - applies only to the additional field of the checkbox type. If this flag is checked, the sorting indicated by the user will be ignored and all options will be sorted alphabetically.
- Multiple checkbox - applies only to the additional field of the checkbox type. If this flag is checked, the value of this field will be able to store many options selected from the list.
Important!
Additional fields can be sorted using the icon ![]() and drag and drop technology.
and drag and drop technology.
Important!
The indication to edit one of the additional fields (by clicking on the name of the additional field) hides all other additional fields to make editing easier.
Subtasks
In the last step we can define a sub-task list, which will be created by default for tasks created in this template.
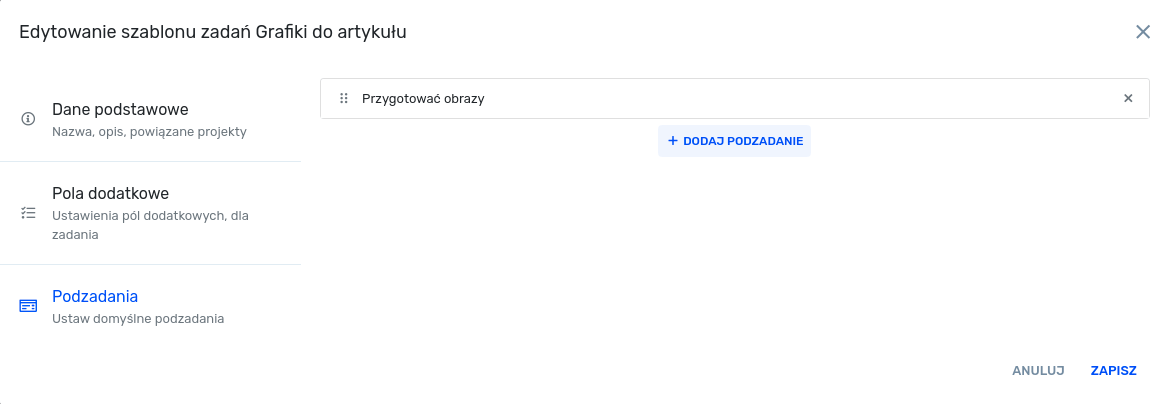
You can add tasks by using the ![]() , while removal is done via the button
, while removal is done via the button ![]() . After clicking the Add subtask button, a form with editing a new subtask is developed.
. After clicking the Add subtask button, a form with editing a new subtask is developed.
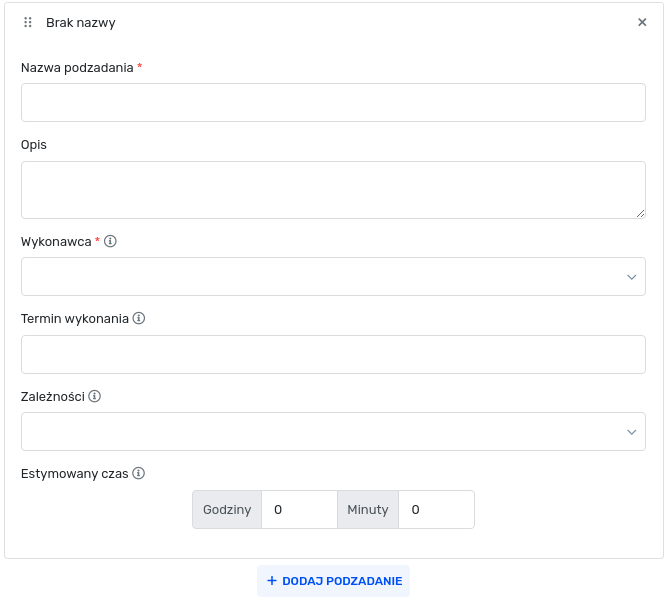
In this form we have several fields to specify.
- Sub-task name - this name will be visible in the task view and in the sub-task itself.
- Description - this field contains description of the subtask. It is not displayed anywhere and is only used to describe the subtask for template managers.
- Performer - for all subtasks, you should indicate the contractor. From the selection list we have a possibility to indicate both specific people and user groups, however, it is recommended to use groups.
- Deadline - in this field we can specify the deadline for the completion of a subtask, indicating the number of days before the end of the deadline to complete the task.
- Estimated time - In this field we can indicate the estimated time for the subtask. These estimations are useful in management and planning.
