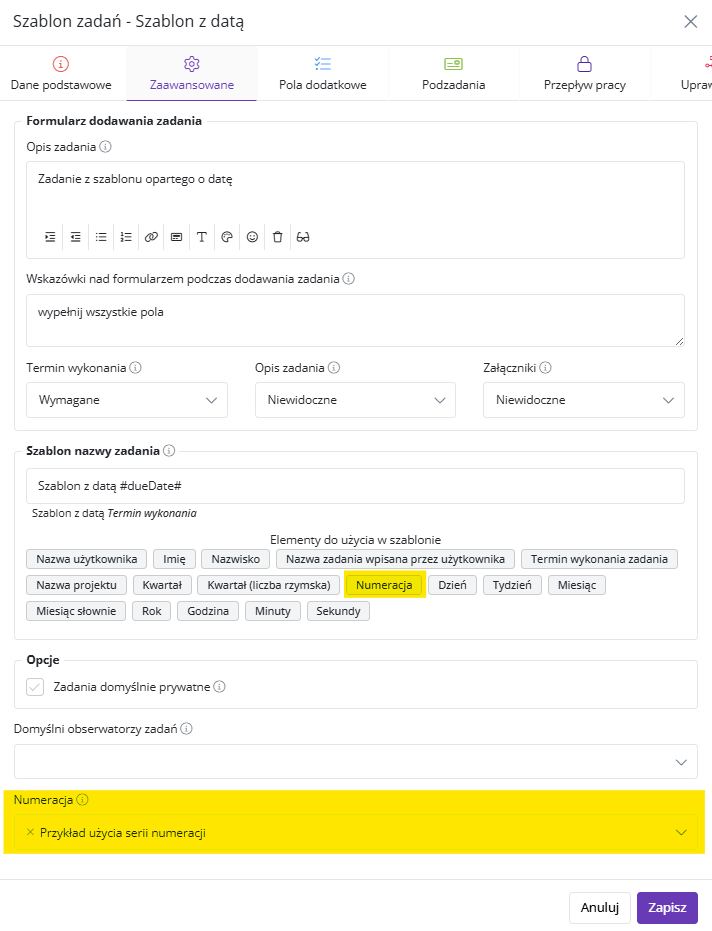
Numbering series – additional numbering for your processes
We’re introducing Numbering series – a new module that allows automatically assigning additional reference numbers to tasks created from templates. This functionality is designed for teams that want to better organize tasks in repeatable processes such as handling complaints, orders, or service requests.
Your format, your rules
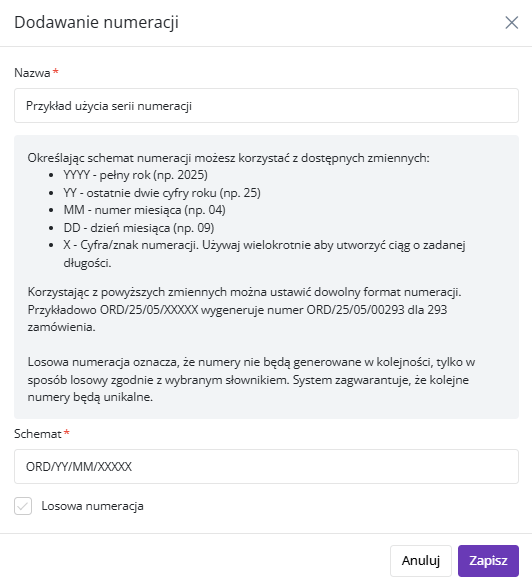
A numbering series can be configured based on variables such as:
- YYYY, YY – year in full or shortened format
- MM, DD – month and day
- X – placeholder for an increasing number (e.g., XXXXX for a 5-digit sequence)
Example use:
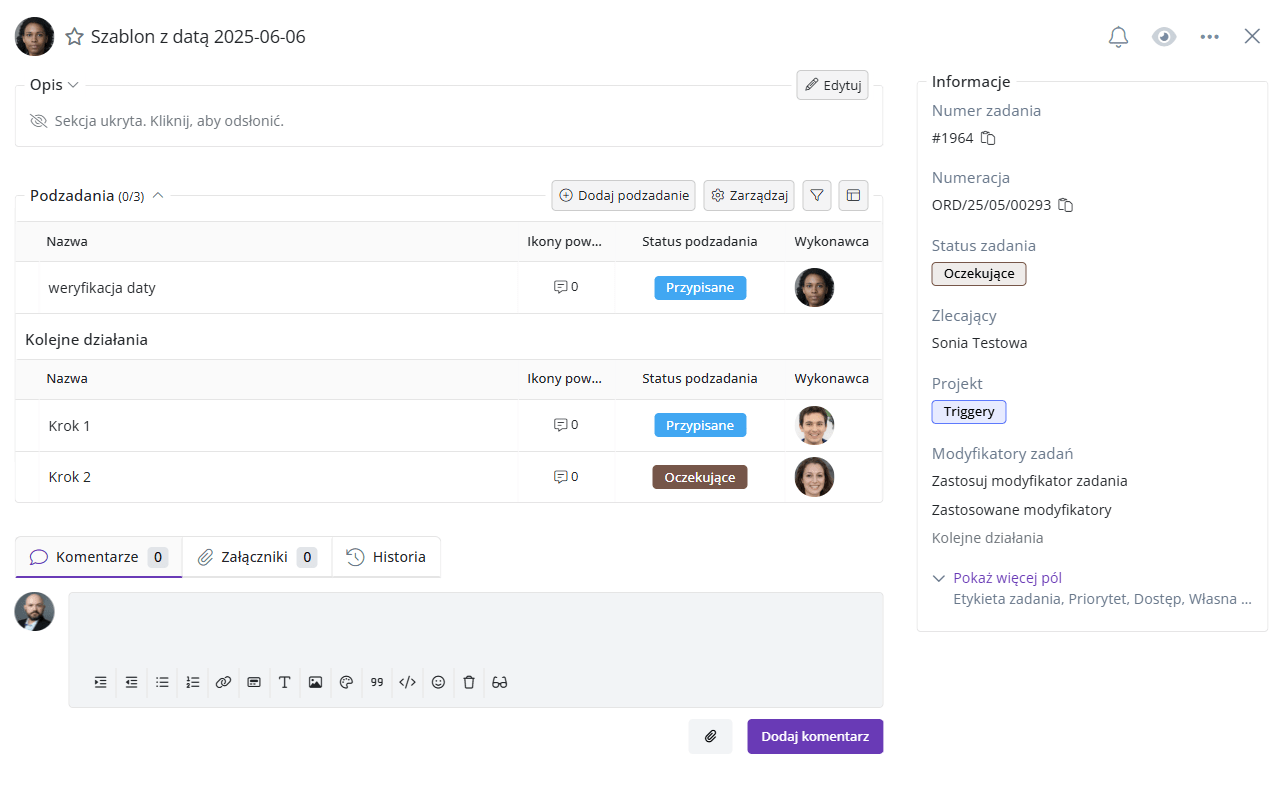
ORD/YY/MM/XXXXX → ORD/25/05/00293
You can also set up random numbering based on a character dictionary – the system will generate unique numbers without maintaining order.
How does it work?
- You create a numbering series – you define its name and format.
- In the task template, you select which numbering series to use – tasks created from this template will automatically receive a number according to the given series.
Important: the numbering series does not replace the standard task number. It is an additional value that can be used in parallel, e.g., as a reference number or for reporting purposes.
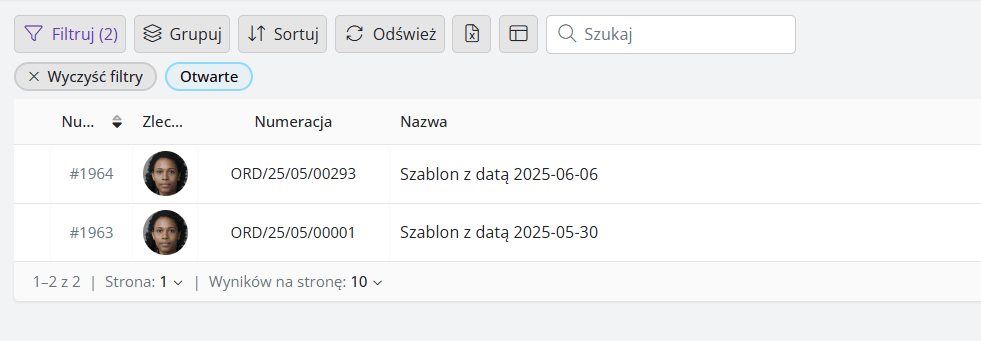
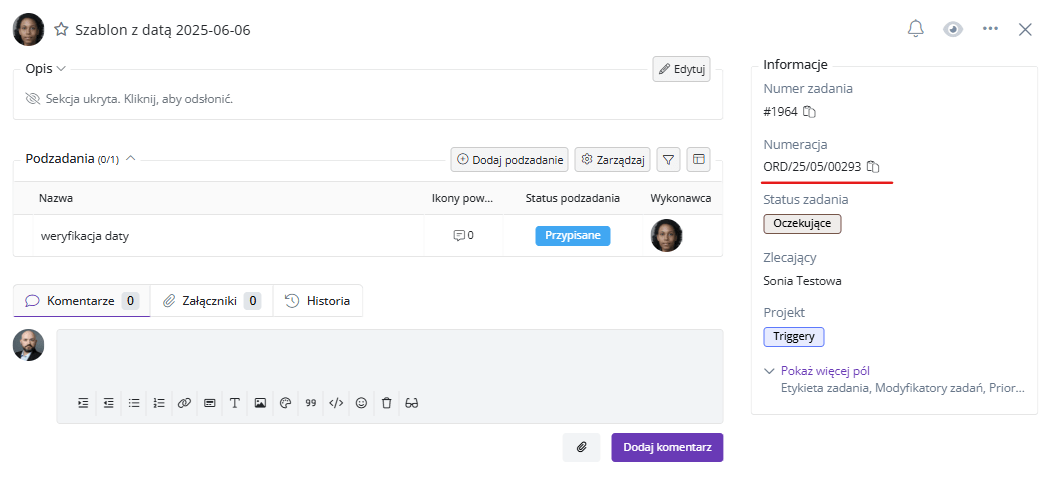
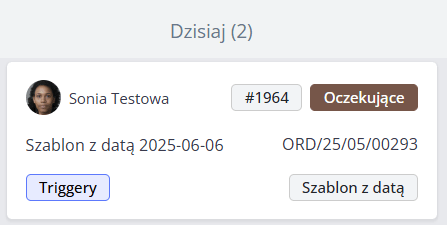
Number visibility
A number from the series can be:
- seen in the task’s right panel (if not visible – click “Show more”),
- used for automatically naming tasks,
- added as a column in the task list,
- displayed on the task card on the board.
Task Modifiers – build flexible step-by-step processes
We present Task Modifiers – a feature that allows dynamically expanding tasks created from templates. Thanks to it, your teams can precisely adapt the task’s structure to its specific case – without complicating the main template or creating multiple versions of it.
Flexibility instead of manually adding steps
Let’s say you have a template for onboarding a new client that includes the main implementation steps. In some cases (e.g., when the client has an insurance policy), additional actions are needed – until now, these were always present as subtasks or had to be added manually.
Thanks to modifiers, you can now add these steps only when they are truly needed – without informational noise and without interfering with the base template.
Modifier = template to the template
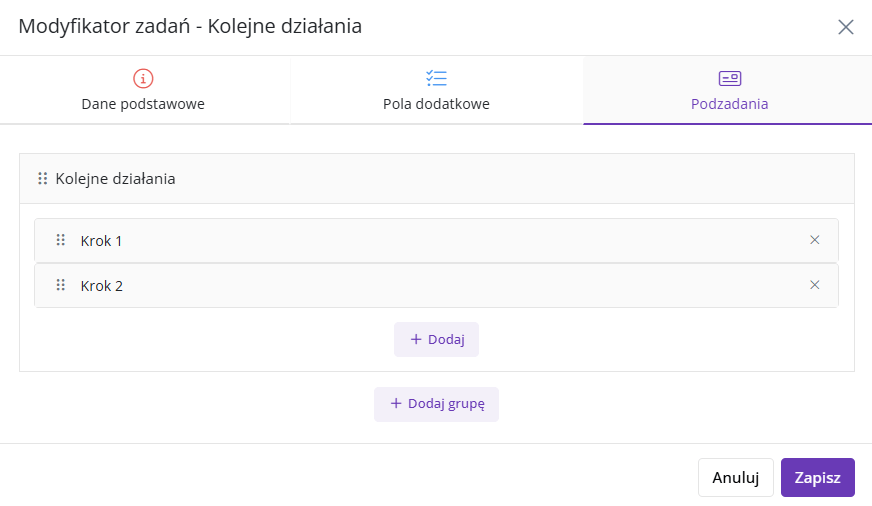
A modifier resembles a template but doesn’t create a new task – it expands the existing task created from the template. This option affects the task’s form by adding:
- additional fields – with the ability to mark them as required,
- a checklist to the main task,
- subtasks, which can include:
- descriptions, deadlines, checklists,
- assignment to a specific user or user group,
- dependencies (only within this modifier),
- assignment to a specific subtask group – a visual block within the task that helps better organize long processes into stages.
Availability configuration
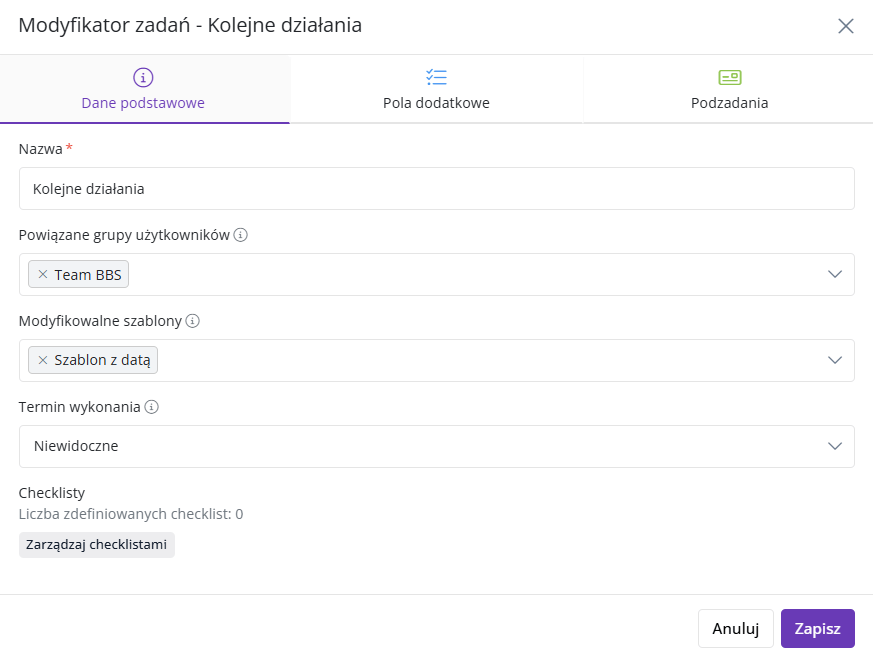
When creating a modifier, the administrator defines:
- for which template it will be available,
- which user groups can use it,
- whether setting a deadline is required or not.
Permissions for this function are configured separately – at the project and template level, similarly to, for example, changing a task’s due date.
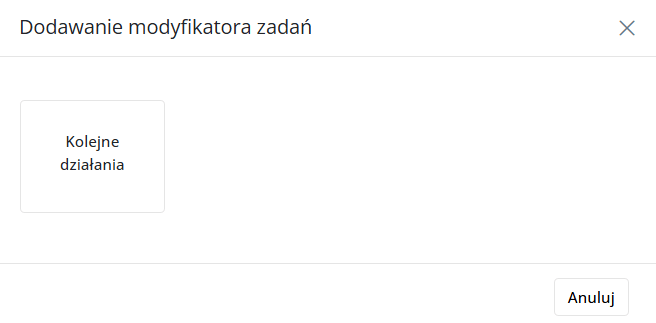
How to activate a modifier?
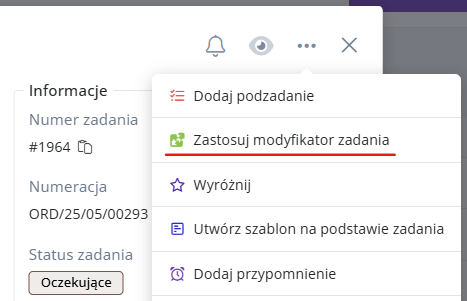
A modifier can be added:
- From the task menu – as one of the options available in the interface.
- From the task’s right panel, in the dedicated “Modifiers” section – allowing quick selection and application of the appropriate set. If needed, the visibility of this section can be configured.
Any number, full freedom
You can add multiple modifiers to one task, as long as they are available for the given template. There are no conflicts or exclusion rules – each modifier extends the task’s structure with additional components.
Administrators retain full control over who can use them and when.
Automations – let tasks act autonomously
We present Automations – a module that allows you to create sets of actions triggered automatically upon specific triggers and conditions. With it, you can introduce repeatability, logic, and consistency into task management, eliminating the need to manually perform some simple operations.
Responding to specific situations in a task
Automations run in the background and activate when a task or subtask meets specified conditions. In response to such events, they can execute one or multiple predefined actions.
Example 1: Subtask returned for revision
An automation can:
- assign the leader as the new assignee,
- change the status to “Assigned”,
- add the label “For review”,
- set a new due date.
This is useful when you want the task to quickly return to the person responsible for checking it.
Example 2: User absence
If you assign a task to a user marked as absent during a given time period:
- the system can notify you about the absence,
- if the user has a substitute, the automation will:
- assign the task to that person,
- add the originally assigned user as an observer.
Example 3: Work marked with the “Done” label
Adding a specific label to a task can:
- automatically change its status to “Closed”,
- send a notification to the leader or the person responsible for quality control.
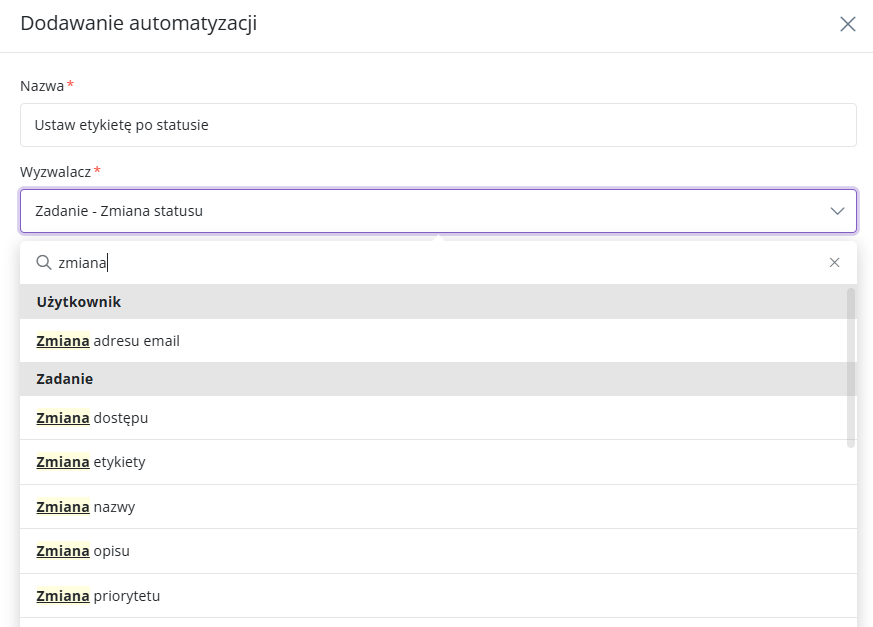
Creating automations step by step
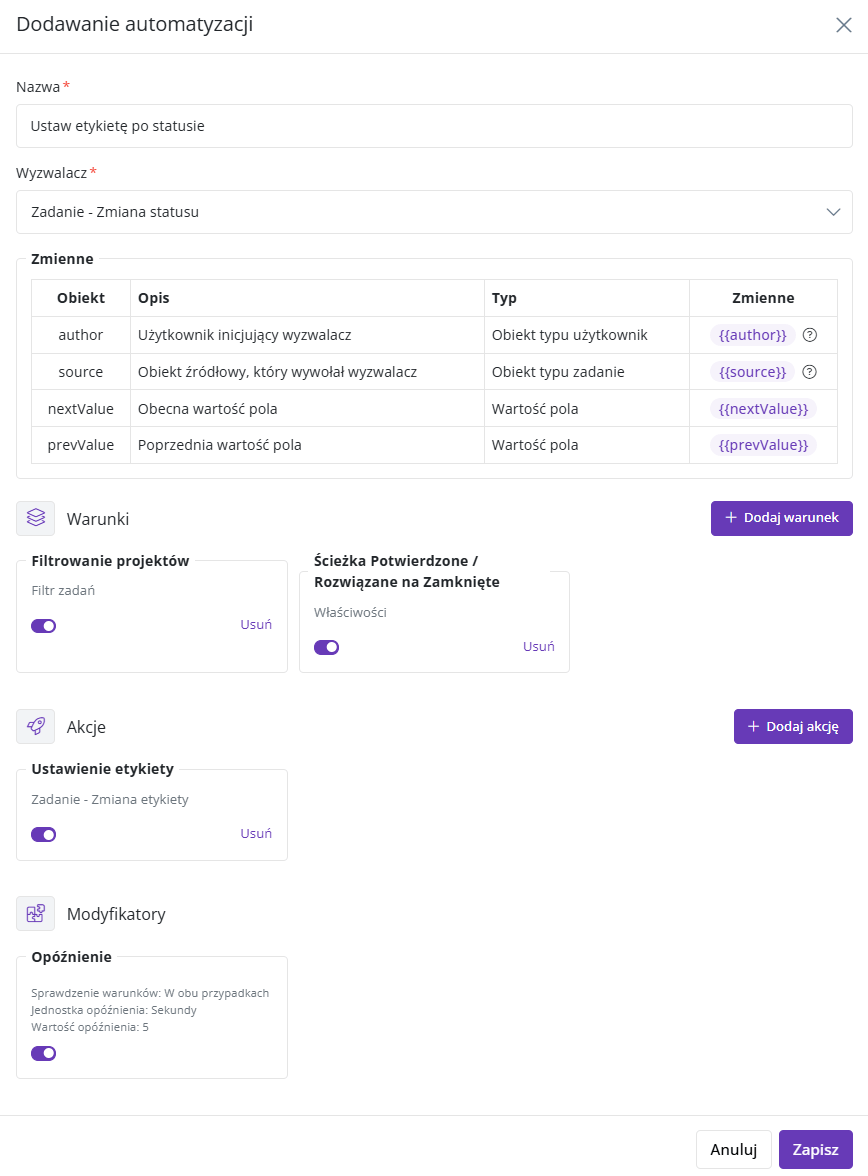
Automations can be created by users with appropriate permissions. The creation process is clear and based on logical steps:
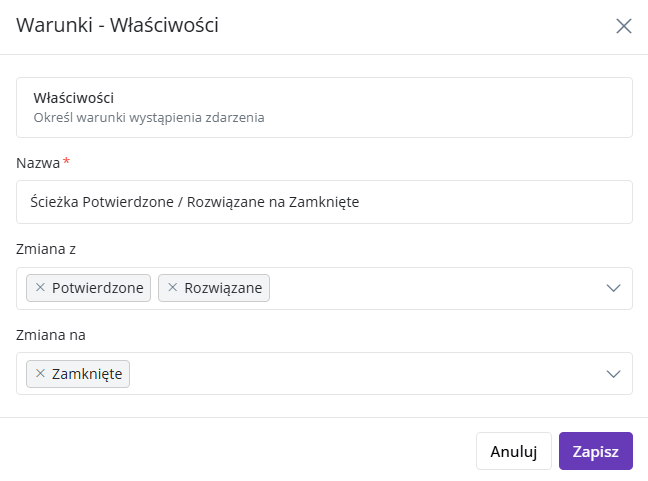
- Assign a name and select a trigger – e.g., task assignment, status change, label addition.
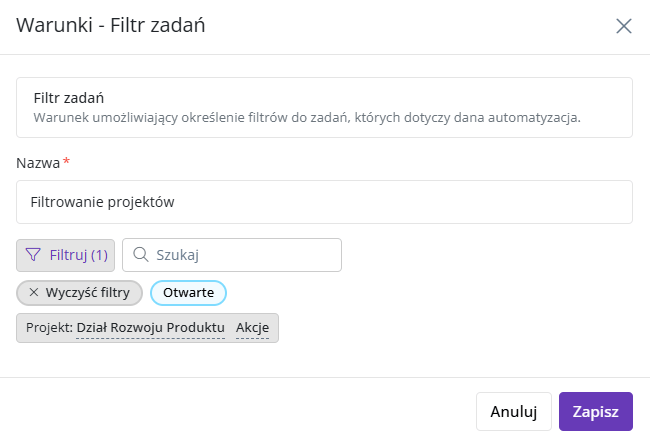
- Define additional conditions – using filters similar to those known from lists and boards. You can limit the automation’s scope to:
- a specific project,
- a template,
- the author,
- the assigned user,
- a specific label.
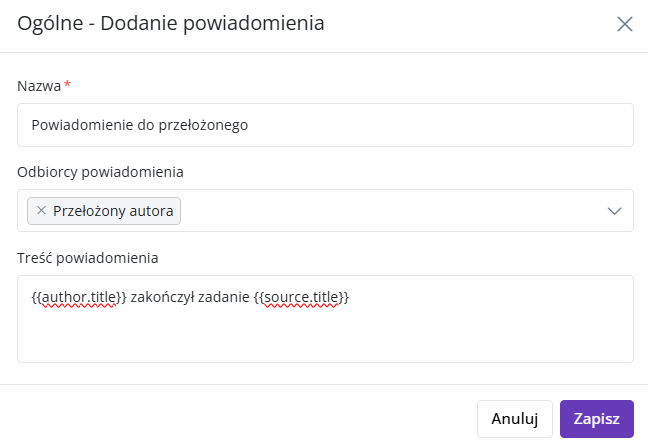
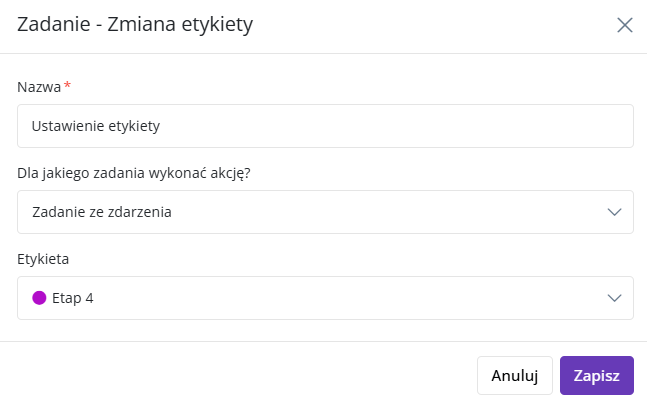
- Select actions the automation should perform, e.g.:
- assign a user or user group,
- change status,
- add a label,
- set a due date for the task or subtask,
- add an observer,
- send a notification.
- (Optional) Execution delay – the automation can perform actions with a specified time offset.
- Saving activates the automation.
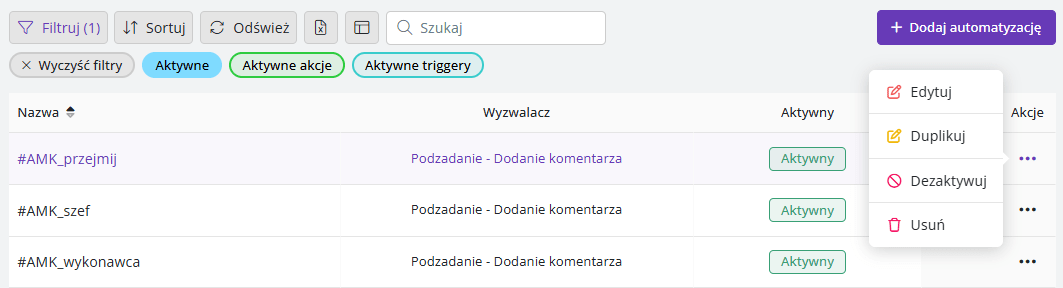
Management and order
Each automation can be:
- deactivated if it should not be used temporarily,
- duplicated to quickly create another based on one,
- deleted if it is no longer needed.
Flexibility thanks to filters
Thanks to the advanced filtering system, you can precisely control the scope of automation actions. Limit their operation, for example, only to:
- tasks in a specific project,
- tasks created from a selected template,
- tasks assigned to certain users or authors,
- tasks containing a specific label.
Here are some examples: