In Fortask, there are several alternative views to present tasks. You can use a traditional task list, a task board (kanban) or a calendar. All these elements can be used interchangeably, and they have one property in common - the ability to apply only one filter at a time. It means that if we want to review tasks assigned to Adam and then check which tasks have been assigned to Martyna we have to use filters and change the contractor or use a previously saved filter. The principle is correct, but surely you were wondering if there is a way to show two lists with tasks for Adam and Martyna "next to each other". Of course there is. And this mechanism allows to achieve much more.
Desktop - a cure for everything?
Desktop is a place which belongs to a user. It is the user who decides what exactly should be there, how it should look and what information should be displayed. This is what makes this mechanism powerful. We can choose from a number of widgets. Each with a different purpose. If you haven't had a chance to configure your desktop yet, you should read this article till the end. We know from experience that a well set up desktop becomes a command center, and thus will positively affect the performance of duties in the company. Chances are, with the right setup, you'll rarely use a traditional task list or whiteboard to search through tasks. One desktop isn't enough? You can create an unlimited number of dashboards in the application, and thus divide widgets by purpose, departments or projects.
How to configure a desktop?
In this matter, there is no single scheme of action. In fact, each user should adjust the elements of his desktop according to his duties in the company. To sum up, users' desktops may differ significantly even in the context of one company. Regardless of the type of information on the desktop, it is worth trying the configuration. The beginnings may be difficult, but surely together we can achieve the right elements. In this article, I will try to give you some basic knowledge about widgets and present how a user dashboard can look like. So let's move on to the configuration.
Assigned Tasks
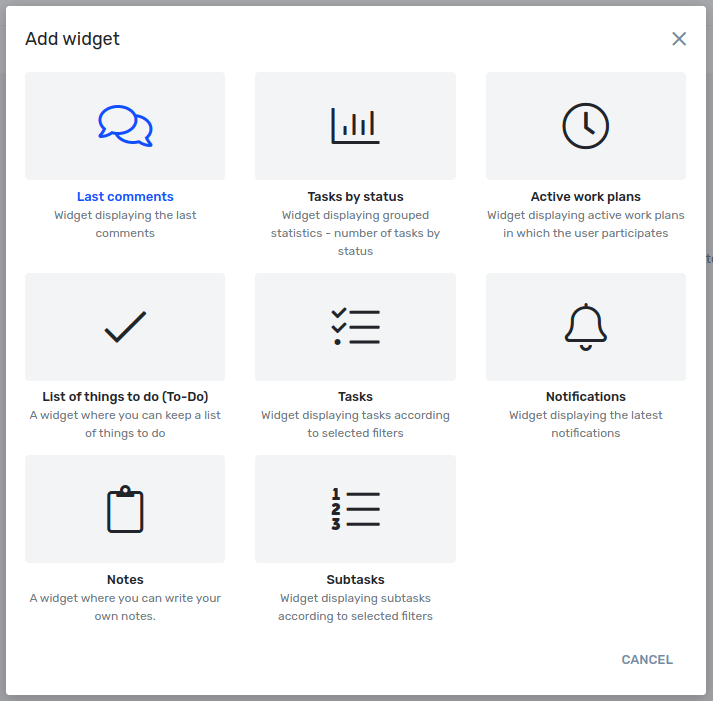
The first widget I will add to my dashboard will contain a list of tasks I have assigned. To do this, click on the Add widget button and in the new window select the Tasks widget type.
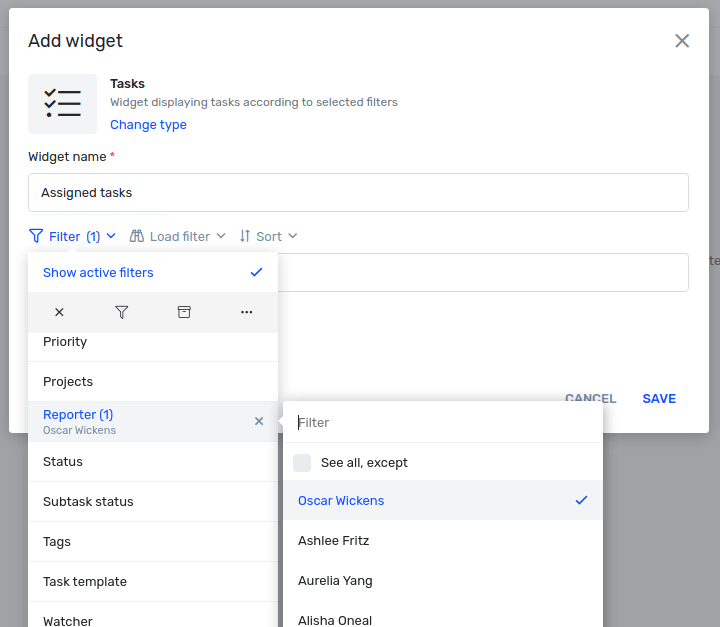
In the next window I change the name to Assigned tasks and use filters. At first, I choose the filter Reporter and indicate myself.
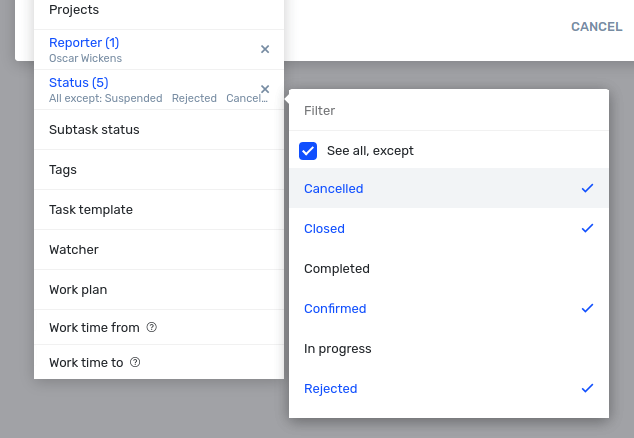
Next, I limit the tasks by taking into account the status of the tasks. In this case, I'm not interested in tasks with the status of cancelled, suspended, rejected, closed and confirmed. So I choose the Status filter, check the See all, except option and select individual statuses.
Additionally, I select the option to sort by due date in ascending order. My filters in the final stage look as follows:
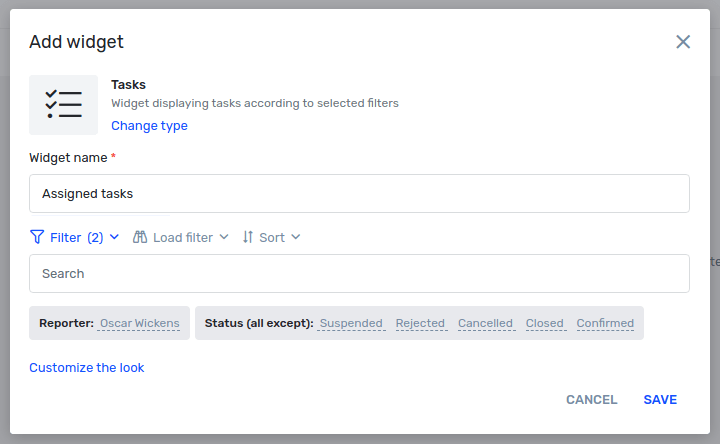
In the presented example I do not need to set other filters, but I could additionally indicate or exclude projects by narrowing the list of tasks.
I save. The first widget added. I can now change the size of the widget by stretching it as much as I want and change its position by moving the element to another place.
Tasks to do
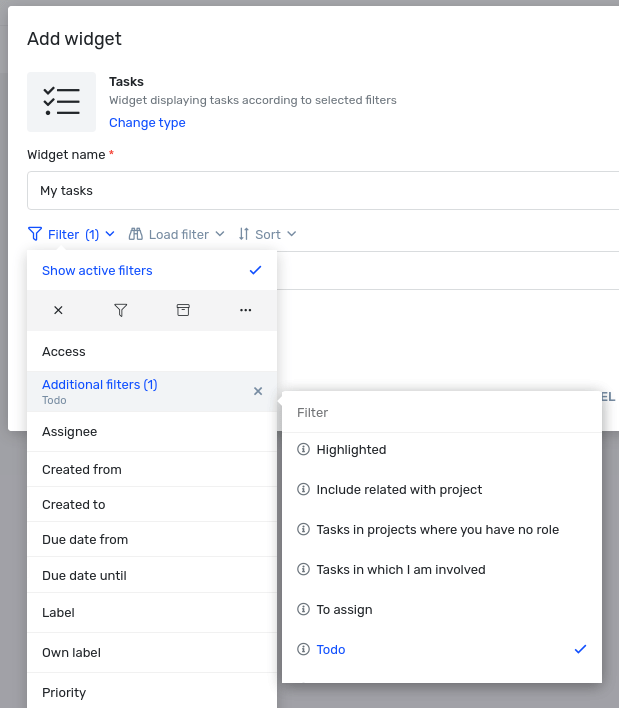
In this case, I can create the widget in two ways. First, I will show the quick way. I add a new widget of type Tasks. I change the name to My tasks. Next, I go to filters and look for the Additional filters item. I select the To Todo option.
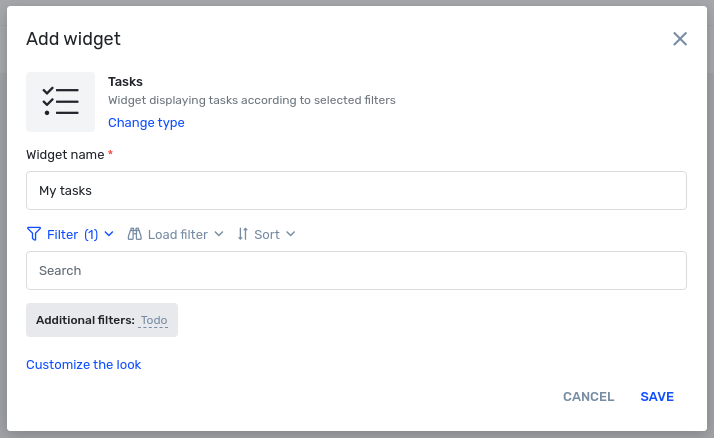
I use sort by due date in descending order. Done. The window with the selected filters should look like this:
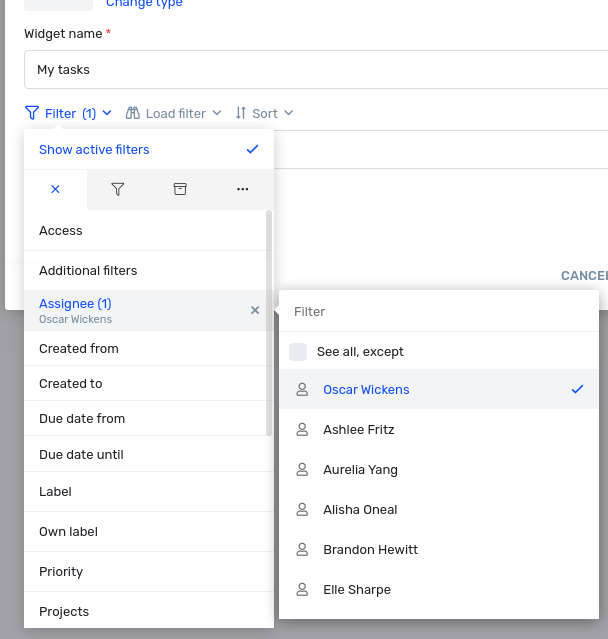
And now I will present the second way, which will ultimately show exactly the same thing, however, I will not use additional filters. So again I add a new widget of the Tasks type. In the filters I indicate the Asignee - myself.
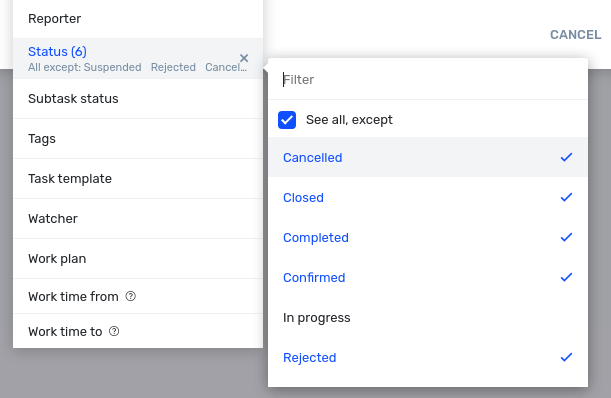
Then I go to the Status filter and again check the See all, excerpt and choose: cancelled, closed, completed, rejected, suspended and confirmed.
Here is an important point. In the case of outsourced tasks, I have limited the list by status only. In the case of tasks to be completed, in addition to the task status, I have to limit the status of subtasks because there may be a situation where the task will consist of several subtasks, and the stage for which I'm responsible will already be completed. As a result, if I didn't limit subtask status, the task would show up on the list because it would still have the status In Progress. So I check See all, excerpt and select three items in the list: completed, confirmed, suspended.
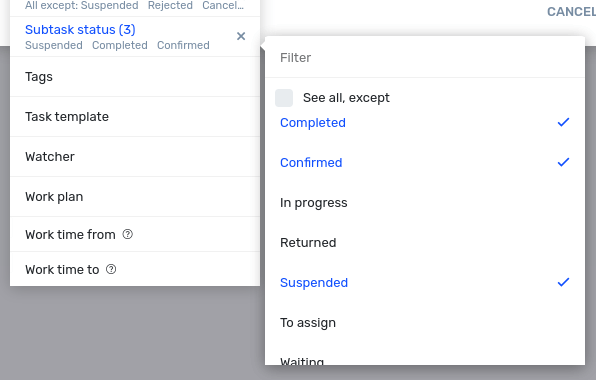
As a result, the widget settings look as follows:

Tasks after the due date
A widget with tasks that are not yet done, but are past their due date can be very helpful. To do this, I add a new widget of type Tasks. I choose one of the additional filters - After due date. Because I want to see the tasks that I have to do on the list, I have to indicate the contractor - again, I select myself.
Tasks for approval
If you are a manager, group leader or simply responsible for a project, you can force every newly added task to be approved by project manager. If this is the case, it's a good idea to have a widget with tasks for approval at hand. To add such a widget, I create a new item of the Tasks type, and then in the filters I choose the status Pending approval and indicate the projects in which I'm a manager.
Notifications
An interesting widget that can provide work on an even higher level is a widget with notifications. In order to add it, I select the Notifications type. This widget has the ability to filter notifications by read status only. I recommend selecting the Show only unread option. After adding such an item, only notifications that I have not yet had time to review will always be available in the list.
Featured tasks
If in your everyday work you work on one task for many days or if you often come back to a topic, it will be useful to be able to highlight tasks. When you click on a task, in the pop-up menu you will see an option Highlight. When clicked, the task will be marked with a yellow star next to the name. Moving on I will now add a widget with a list of highlighted tasks . To do this, I add a new widget of the Tasks type and select a filter, specifically Highlighted in Additional Filters. After saving I get a list of highlighted tasks that are always available at hand.
TODO list
What would a desktop be if it didn't have the ability to keep notes in the form of a to-do list. In order to add such a list, I proceed to add a widget. From the list of types, I select TODO List. I select no date in the date format field and add the item. From now on I can quickly note down what I still have to do. Additionally, I can choose to filter to items I haven't done yet.
In the above article, I've provided some examples of widgets that are worth configuring in your user account. Of course, each of them can be modified according to the need or specifics of working in a particular company in a particular position. However, regardless of your role in the team, remember that the dashboard can positively affect the comfort and efficiency of your work. If you haven't configured your dashboard yet, go back to the beginning of this article and add the widgets presented here and you will see how easy it is and how many positive aspects it can bring to your work.